Bat Multi-Purpose Shelf

Hey there ghouls and creeps! With it being the start of a new year I thought this would be a great time to refresh the top of my nightstand! This is a project I have been wanting to do for a while but wasn’t sure how I wanted to organize my things. After perusing the wood section at my local craft store, I got it! Since I’m brand new to the world of woodworking/carpentry and I personally own very few tools (at least for now), I decided to make this project as accessible as possible. I’m always looking for ways to make items in my living space multi-purpose since I don’t live in a large space, so this project also checked off this box too. This shelf is great for any little knick-knacks and also serves as a jewelry rack. Let’s get started!

I rated this project as being easy because it’s intended to be cut by a laser. If you have access to a scroll saw, this would work to trace the template then cut manually. Unfortunately, I believe a jigsaw would not be able to cut such an intricate pattern. *Make sure to follow all operating recommendations and be aware of all risks/warnings when operating power tools!

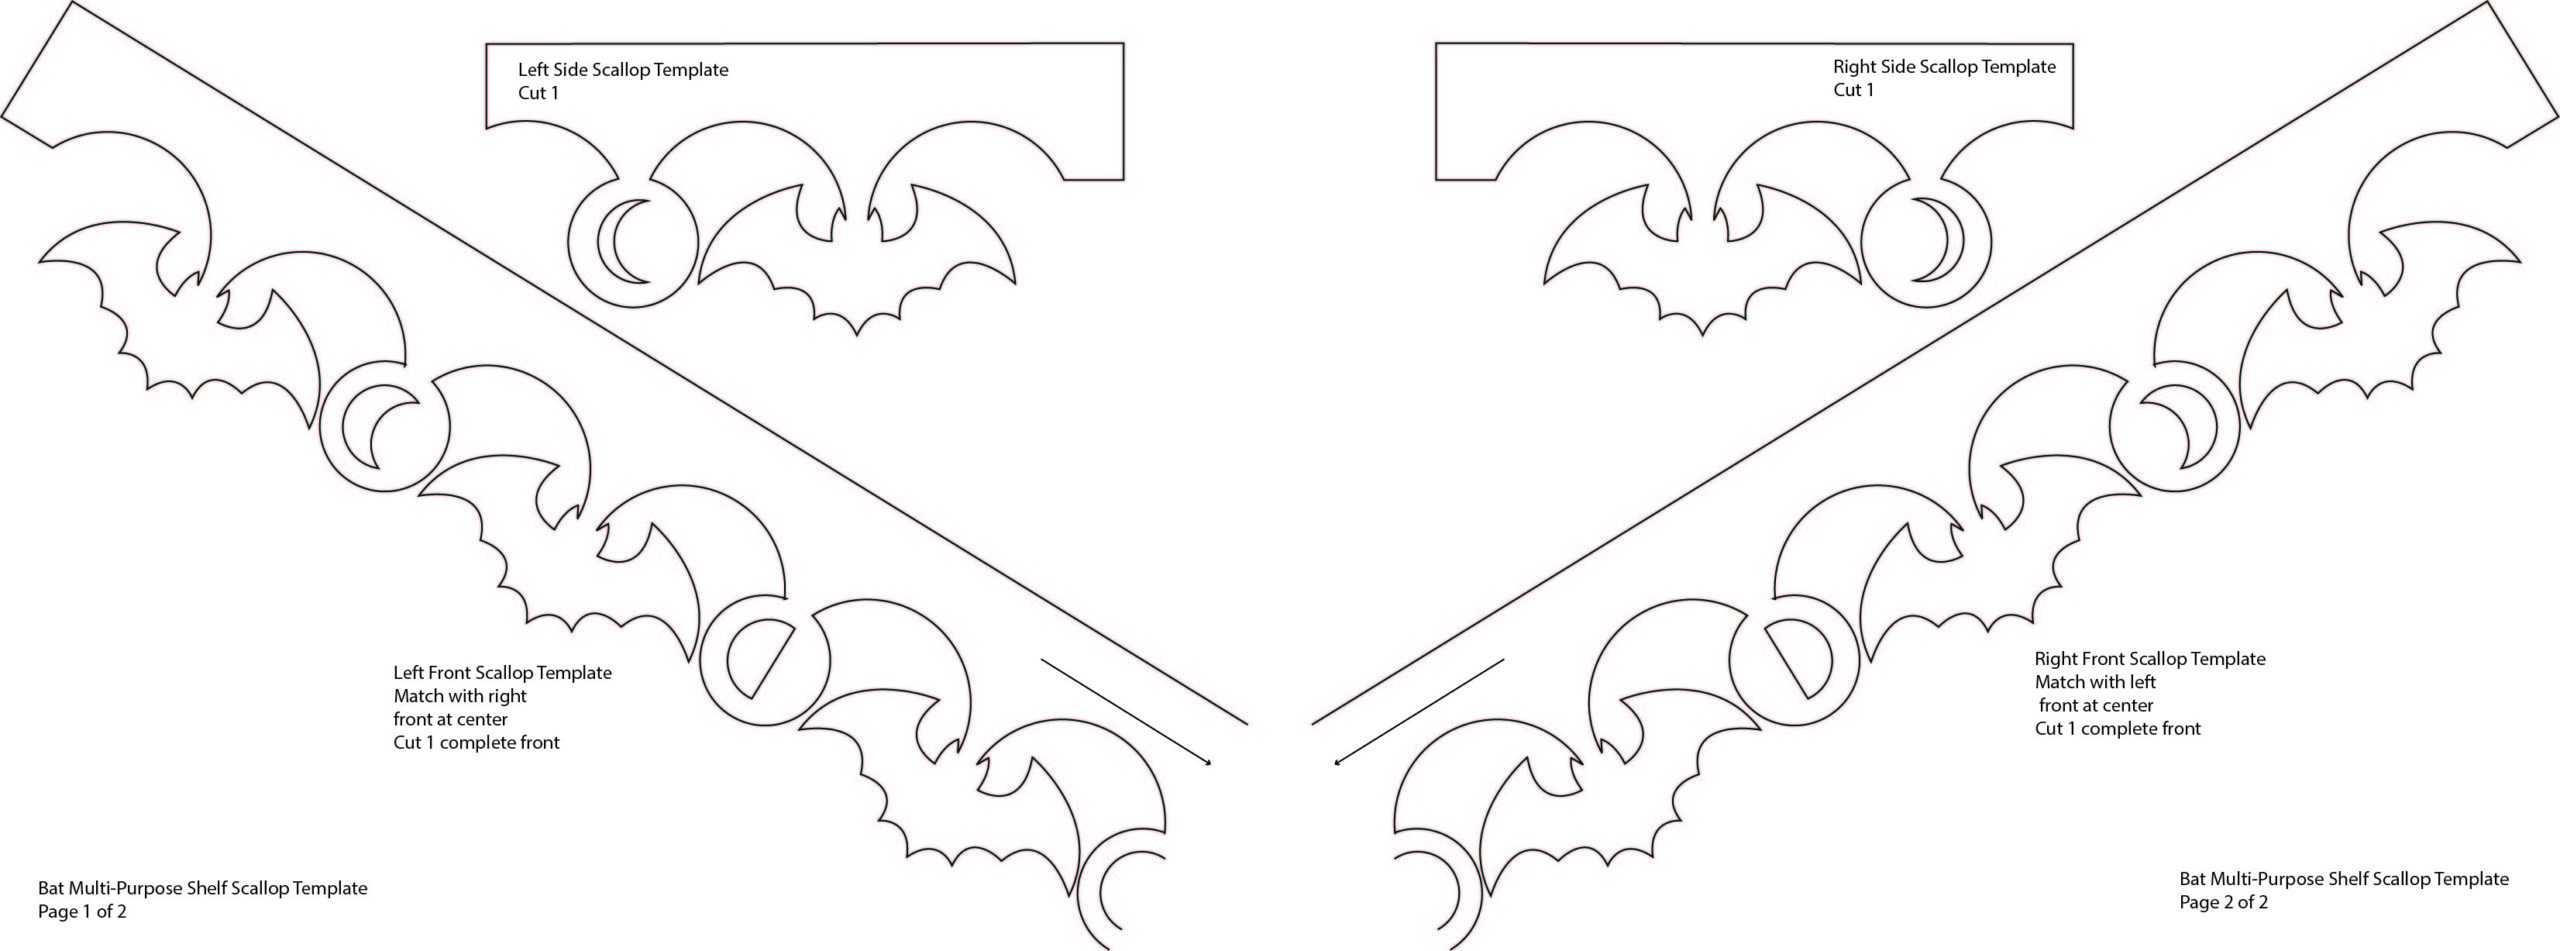
Step 1: Cutting Bat Scallop Shelf Decoration: Use the JPG or SVG files below to cut your bat scallops for your shelf edge. The JPG file is great for Cricut or to print, trace and cut with a power tool of your choice. The SVG file can also be used in Cricut Design Space and on most other die-cutters and laser cutters.
SVG file: https://bjdiycutfiles.s3.us-west-2.amazonaws.com/bat+shelf.svg


Step 2: Drilling Holes/Attaching Scallop Edge: Measure and mark in 2″ increments jewelry hook placement on the support board under the shelf. Taking a 1/16 drill bit, drill holes where marks are located. You do not need to go all the way through the support board with the drill holes, a 1/2″ deep will work!


Replace the drill bit with an 11/64 drill bit and drill holes at an incline into the faux shelf brackets. These will be for hanging the shelf later.


Line up scallop cuts with your shelf edge to verify the length, and cut away any excess where necessary. I found with the particular shelf I purchased, I had to cut away about an 1/8″ off the back of the side scallop pieces. If you would like your scallop edge to have mitered corners, make the necessary cuts before gluing. Take wood glue and apply along the front edge of the shelf.

Firmly press the scallop edge along the front of the shelf. Make sure to line up scallop edges so top is flush with the top of the shelf. The side edges should also extend an 1/8″ past the ends of the shelf. Clamp the scallops to the shelf edge and allow to dry following the manufacturer’s instructions.

Repeat these steps for the side scallop pieces. The one variation is that the sides should not extend past the front or back edges of the shelf.

Step 3: Applying Wood Filler: To polish the appearance of my shelf I wanted to fill in the nail holes as well as the plate groove cut into the shelf’s top by the manufacturer. To do that, I took some Plastic Wood filler and a putty knife and generously filled in the holes and groove. I found after about five hours of drying time the filler was adequately dry.

I then took sandpaper and removed any excess filler (don’t forget your respirator!).
Step 4: Paint your Shelf: After you’re finished removing excess filler, you can start painting your shelf! Of course, I resorted to my preferred brand (Montana Gold) for this task, which I highly recommend! Apply as many coats as needed to fully cover your shelf, following the manufacturer’s instructions for dry times.

Once completely dry, use holes drilled into the support board to manually twist cup hooks in place.

Step 5: Hang and Enjoy!: Hang your shelf with your preferred hardware and enjoy! I used the shelf’s top as a new home for my Coraline Funko Pop! collection and the hooks underneath to hang and display jewelry pieces for easy access! What will you use yours for? Let me know below in the comments!
Liking the content you see here on Britni Jade DIY? Make sure to subscribe to the email list and follow Britni Jade DIY on Instagram, Facebook, and Pinterest! Links are provided below!
Ready for your next project? Here are some tutorials on the blog I think you’ll like! Frame Flip tutorial: https://britnijade.com/frame-flip/, Macrame Wall Hanging: https://britnijade.com/macrame-wall-hanging-w-bones/, or the Spider Web Macrame: https://britnijade.com/spider-web-macrame/. Enjoy!


